Creating a digital planner turns scattered to‑dos into a polished, searchable system that lives on your phone, tablet, or computer. Whether you want daily dashboards, habit trackers, or budget sheets, a well‑crafted planner boosts focus and reduces overwhelm. The following steps walk you through selecting tools, visualizing pages, refining design, and getting your planner into the hands of users who need it.
Gather the Right Tools and Resources
Start by picking a platform that matches your workflow. Apps like Notability, GoodNotes, or Canva let you blend text, graphics, and interactive links. A stylus such as the Apple Pencil or Samsung S Pen gives you pressure‑sensitive control for drawing and handwriting. Store everything in a cloud service like Google Drive or Dropbox so you can access the planner from any device. Finally, decide whether you’ll deliver the planner as a PDF for universal access or as an editable file format for power users.
- Design software: Canva, Adobe Illustrator, or Affinity Designer.
- Note‑taking apps: Notability, GoodNotes, or Nebo.
- Stylus: Apple Pencil, Samsung S Pen, or a pressure‑sensitive pen.
- Cloud storage: Google Drive, Dropbox, or iCloud for backup.
Design Your Layout and Templates

Map out the visual flow of each page before you start designing. Begin with a cover that announces the planner’s theme using a bold title and a subtle background image. Follow with a contents page that lists sections and page numbers, making navigation a single tap. Within each section, create repeatable blocks such as habit trackers, goal meters, or budget tables, using grids that respect your margins. Layering text boxes over shapes lets you add icons without breaking consistency, and you can swap colors later to match personal taste.
- Cover page with theme graphic.
- Contents page with indexed sections.
- Modular blocks: habit tracker, goal meter, budget table.
- Consistent margin and grid system.
Finalize, Export, and Share Your Planner
When the design feels cohesive, test every link, dropdown, and interactive element on multiple devices to catch glitches early. Export the finished planner as a high‑resolution PDF and upload it to a cloud folder for seamless syncing. If you plan to sell, set up a storefront on Gumroad or Etsy, price according to complexity, and create a preview thumbnail that highlights the cover page. Collect early feedback from a small beta group, adjust spacing or wording, and schedule quarterly updates to keep the planner fresh and relevant.
Test, Iterate, and Publish
Launch a soft release by sharing the PDF with friends, online communities, or email subscribers. Ask them to point out any broken links, confusing layouts, or missing pages. Incorporate the feedback, then republish the updated version with a clear call‑to‑action and a link to your sales page. Maintaining a version history lets users know when new features arrive, and it builds trust in your ongoing support.
Creating a digital planner turns scattered to‑dos into a polished, searchable system that lives on your phone, tablet, or computer. Whether you want daily dashboards, habit trackers, or budget sheets, a well‑crafted planner boosts focus and reduces overwhelm. The following steps walk you through selecting tools, visualizing pages, refining design, and getting your planner into the hands of users who need it.
Gather the Right Tools and Resources
Start by picking a platform that matches your workflow. Apps like Notability, GoodNotes, or Canva let you blend text, graphics, and interactive links. A stylus such as the Apple Pencil or Samsung S Pen gives you pressure‑sensitive control for drawing and handwriting. Store everything in a cloud service like Google Drive or Dropbox so you can access the planner from any device. Finally, decide whether you’ll deliver the planner as a PDF for universal access or as an editable file format for power users.
- Design software: Canva, Adobe Illustrator, or Affinity Designer.
- Note‑taking apps: Notability, GoodNotes, or Nebo.
- Stylus: Apple Pencil, Samsung S Pen, or a pressure‑sensitive pen.
- Cloud storage: Google Drive, Dropbox, or iCloud for backup.
Design Your Layout and Templates
Map out the visual flow of each page before you start designing. Begin with a cover that announces the planner’s theme using a bold title and a subtle background image. Follow with a contents page that lists sections and page numbers, making navigation a single tap. Within each section, create repeatable blocks such as habit trackers, goal meters, or budget tables, using grids that respect your margins. Layering text boxes over shapes lets you add icons without breaking consistency, and you can swap colors later to match personal taste.
- Cover page with theme graphic.
- Contents page with indexed sections.
- Modular blocks: habit tracker, goal meter, budget table.
- Consistent margin and grid system.
Finalize, Export, and Share Your Planner
When the design feels cohesive, test every link, dropdown, and interactive element on multiple devices to catch glitches early. Export the finished planner as a high‑resolution PDF and upload it to a cloud folder for seamless syncing. If you plan to sell, set up a storefront on Gumroad or Etsy, price according to complexity, and create a preview thumbnail that highlights the cover page. Collect early feedback from a small beta group, adjust spacing or wording, and schedule quarterly updates to keep the planner fresh and relevant.
Test, Iterate, and Publish
Launch a soft release by sharing the PDF with friends, online communities, or email subscribers. Ask them to point out any broken links, confusing layouts, or missing pages. Incorporate the feedback, then republish the updated version with a clear call‑to‑action and a link to your sales page. Maintaining a version history lets users know when new features arrive, and it builds trust in your ongoing support.
Process Of Making Pottery,Thai Art 17118859 Stock Video At Vecteezy

Process of making pottery,Thai art 17118859 Stock Video at Vecteezy
12,110 Process Pasta Making Images, Stock Photos & Vectors | Shutterstock

12,110 Process Pasta Making Images, Stock Photos & Vectors | Shutterstock
Baking Bread Step-by-Step: A Visual Guide To The Bread Making Process
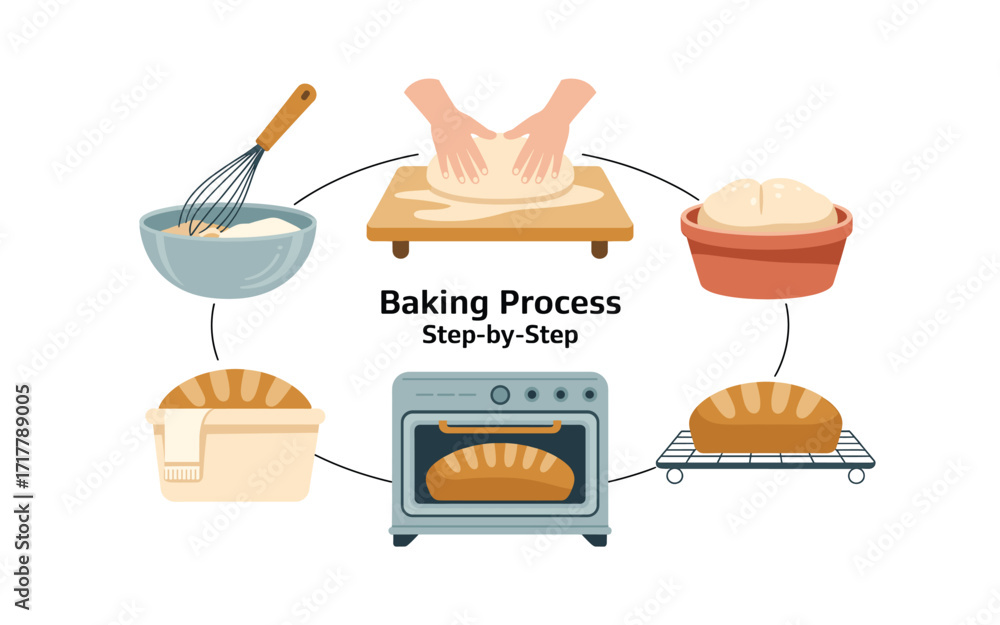
Baking Bread Step-by-Step: A Visual Guide to the Bread Making Process ...